Building a web framework on top of Spring MVC
The Spring Framework ships with its own web framework : Spring MVC. One can use Spring MVC as a full-blown web framework, to build web applications but Spring MVC can act also as a foundation for higher level and more focused application frameworks. For example, Spring Web Flow builds on top Spring MVC, as well as the Grails framework. This post aims at showing how to create a simple web framework with Spring MVC, with Groovy as the view technology. You’ll find it especially useful if you’re a Spring MVC developer and want to learn more about the framework internals or if you’re curious about how Spring Web Flow and Grails are implemented. But remember that this is not an article about using the annotation-based version of Spring MVC, it’s more about how it is implemented !
Spring MVC : the big picture
Before implementing our web framework, let’s see how Spring MVC works to see on which of its extensions we’ll have to plug on. Spring MVC is designed around the Model-View-Controller 2 pattern, so it means it provides a front controller, the DispatcherServlet which receives the incoming HTTP requests, does some processing before delegating the request to an application component, called the handler, and then renders the view. The handler is the Java class you write at the end, to deal with the HTTP parameters and call the appropriate business services, before choosing to forward to the view. The handler is also called the controller sometimes.
What do we mean when we say that « the DispatcherServlet does some processing » ? Mainly, dealing with the plumbing, by converting the HTTP request into something easier to deal with for the application controller, so that it does not depend on the Servlet API for example.
In Spring MVC, the DispatcherServlet delegates a lot to infrastructure components. This prevents the DispatcherServlet‘s code to be bloated and also provides a much better extensibility: these infrastructure components can be swapped out, using different implementations, to change the way controllers are called, views are rendered and so on. The following figure shows the main infrastructure components :

To implement our own web framework, we’ll have to develop a specific implementation for each of them. Here is a description of all these components :
HandlerMapping: chooses the appropriate handler that should process the request. It can base its decision on the URL but also on HTTP parameters or headers (everything in the HTTP request actually)
HandlerAdapter: handles the delegation of the request to the handler. The HandlerAdapter is about calling the right method on the handler, with the parameters the handler expects.
ViewResolver: creates the View object depending on what the handler returned (usually, the logical name of the view, as a String)
View: renders the view (e.g. outputs generated HTML code to the HttpServletResponse)
The HandlerMapping, HandlerAdapter and the ViewResolver are infrastructure beans: they lie in the DispatcherSerlet‘s application context. As soon as you declare a bean of one these types, the DispatcherServlet picks it up and will use it. Note any infrastructure bean declared will replace the default ones. Note also that the DispatcherServlet maintains a list for each type of infrastructure beans and use them following a chain of responsability pattern, as the DispatcherServlet iterates over the list and stops as soon as an infrastructure bean handled the delegation. This allows to making several programming models cohabiting in the same DispatcherServlet for example.
The My MVC framework
We are going to create a very simple web framework, the My MVC framework, on top of Spring MVC. Controllers will need to implement the following interface :
-
package com.zenika.mymvc;
-
import java.util.Map;
-
public interface MyMvcController {
-
String handle(Map<String, String> parameters,Map<String,Object> model);
-
String getPath();
-
}
The parameters parameter in the handle method is a mapping of the incoming HTTP parameters and the model parameter is where the application developper will store data (domain objects for example) to push them to the view. The getPath method is about mapping the controller on an URL, relative to the owning DispatcherServlet. Here is an example of My MVC controller :
-
public class ContactMyMvcController implements MyMvcController {
-
@Autowired
-
private ContactService contactService;
-
@Override
-
public String getPath() {
-
return « /myfirst »;
-
}
-
@Override
-
public String handle(Map<String, String> parameters, Map<String, Object> model) {
-
model.put(« contact »,contactService.get(parameters.get(« id »)));
-
return « contact »;
-
}
-
}
Such a controller will be declared as a Spring bean in the DispatcherServlet application context, either explictly (XML) or automatically (component scanning), it doesn’t matter. Let’s start the creation of our web framework by implementing the HandlerMapping.
Implementing the HandlerMapping
The HandlerMapping is about mapping our controllers to URL. It means the HandlerMapping must return a controller to the DispatcherServlet depending on the incoming request. The code of our MyMvcHandlerMapping uses some hooks of the Spring Framework but it’s quite straightforward :
-
package com.zenika.mymvc;
-
import java.util.HashMap;
-
import java.util.Map;
-
import javax.servlet.http.HttpServletRequest;
-
import org.springframework.beans.BeansException;
-
import org.springframework.context.ApplicationContext;
-
import org.springframework.context.ApplicationContextAware;
-
import org.springframework.web.servlet.HandlerExecutionChain;
-
import org.springframework.web.servlet.HandlerMapping;
-
public class MyMvcHandlerMapping implements HandlerMapping,ApplicationContextAware {
-
private Map<String, MyMvcController> _urlToControllers = new HashMap<String, MyMvcController>();
-
@Override
-
public HandlerExecutionChain getHandler(HttpServletRequest request)
-
throws Exception {
-
MyMvcController controller = _urlToControllers.get(request.getPathInfo());
-
return controller == null ? null : new HandlerExecutionChain(controller);
-
}
-
@Override
-
public void setApplicationContext(ApplicationContext ctx)
-
throws BeansException {
-
Map<String, MyMvcController> controllers = ctx.getBeansOfType(MyMvcController.class);
-
for(MyMvcController controller : controllers.values()) {
-
_urlToControllers.put(controller.getPath(),controller);
-
}
-
}
-
}
The MyMvcHandlerMapping will also be a Spring bean, so it can get a reference to the Spring application context by implementing the ApplicationContextAware interface. From the ApplicationContext, it can lookup all the declared MyMvcControllers and store them in a Map, using a mapping like [URL] => [MyMvcController]. When asked by the DispatcherServlet, it can take a look at the incoming request and try to find a controller which is mapped on the URL. The getHandler must return a HandlerExecutionChain, which is mainly about decorating the controller by interceptors (we won’t use this in My MVC).
That’s it for the HandlerMapping, let’s move on to the HandlerAdapter.
Implementing the HandlerAdapter
The MyMvcHandlerAdapter is there to convert the HTTP parameters into the Map that a MyMvcController expects, create an empty model and call the handle method on the MyMvcController:
-
package com.zenika.mymvc;
-
import java.util.HashMap;
-
import java.util.Map;
-
import javax.servlet.http.HttpServletRequest;
-
import javax.servlet.http.HttpServletResponse;
-
import org.springframework.util.StringUtils;
-
import org.springframework.web.servlet.HandlerAdapter;
-
import org.springframework.web.servlet.ModelAndView;
-
public class MyMvcHandlerAdapter implements HandlerAdapter {
-
@Override
-
public ModelAndView handle(HttpServletRequest request,
-
HttpServletResponse response, Object handler) throws Exception {
-
MyMvcController controller = (MyMvcController) handler;
-
Map<String, String> parameters = new HashMap<String, String>();
-
for(Object key : request.getParameterMap().keySet()) {
-
parameters.put(key.toString(), extractParameter(request.getParameterValues(key.toString())));
-
}
-
Map<String, Object> model = new HashMap<String, Object>();
-
String viewName = controller.handle(parameters, model);
-
return new ModelAndView(viewName, model);
-
}
-
@Override
-
public boolean supports(Object handler) {
-
return handler instanceof MyMvcController;
-
}
-
@Override
-
public long getLastModified(HttpServletRequest request, Object handler) {
-
return –1;
-
}
-
private String extractParameter(String [] values) {
-
if(values == null || values.length == 0) {
-
return « »;
-
} else if(values.length == 1) {
-
return values[0];
-
} else {
-
return StringUtils.arrayToCommaDelimitedString(values);
-
}
-
}
-
}
Done, our MyMvcControllers will be correctly called, with the parameters they are expected. They will do their own business and return the logical name of view that will handled by our ViewResolver.
Implementing the ViewResolver and the Groovy-based View
A ViewResolver is about creating the correct view. As stated previously, we are going to use Groovy as our view technology. Why? Let’s say because it’s more fancy than using a template engine like Freemarker (especially because Spring MVC already provides such a ViewResolver). So here is the code of our Groovy-based View implementation :
-
package com.zenika.mymvc;
-
import groovy.lang.GroovyShell;
-
import java.util.Map;
-
import javax.servlet.http.HttpServletRequest;
-
import javax.servlet.http.HttpServletResponse;
-
import org.springframework.core.io.Resource;
-
import org.springframework.web.servlet.View;
-
public class GroovyView implements View {
-
private Resource resource;
-
public GroovyView(Resource resource) {
-
super();
-
this.resource = resource;
-
}
-
@Override
-
public String getContentType() {
-
return « text/html »;
-
}
-
@Override
-
public void render(Map<String, ?> model, HttpServletRequest request,
-
HttpServletResponse response) throws Exception {
-
GroovyShell shell = new GroovyShell();
-
for(Map.Entry<String, ?> entry : model.entrySet()) {
-
shell.setVariable(entry.getKey(), entry.getValue());
-
}
-
shell.setVariable(« model », model);
-
Object result = shell.evaluate(resource.getInputStream());
-
response.setContentType(getContentType());
-
response.getWriter().append(result.toString());
-
}
-
}
Our GroovyView uses the Groovy API to execute a Groovy script, so it means our My MVC views are Groovy scripts, meaning they should return the HTML code they want to send to the user.
The GroovyMyMvcViewResolver is about locating these Groovy scripts and creating the corresponding GroovyView objects. We can add some location logic, to be able the store our Groovy scripts in a dedicated directory :
-
package com.zenika.mymvc;
-
import java.util.Locale;
-
import org.springframework.context.ResourceLoaderAware;
-
import org.springframework.core.io.Resource;
-
import org.springframework.core.io.ResourceLoader;
-
import org.springframework.web.servlet.View;
-
import org.springframework.web.servlet.ViewResolver;
-
public class GroovyMyMvcViewResolver implements ViewResolver,ResourceLoaderAware {
-
private String prefix,suffix;
-
private ResourceLoader resourceLoader;
-
@Override
-
public View resolveViewName(String viewName, Locale locale)
-
throws Exception {
-
Resource resource = resourceLoader.getResource(prefix+viewName+suffix);
-
if(resource.exists()) {
-
return new GroovyView(resource);
-
} else {
-
return null;
-
}
-
}
-
@Override
-
public void setResourceLoader(ResourceLoader rl) {
-
this.resourceLoader = rl;
-
}
-
public void setPrefix(String prefix) {
-
this.prefix = prefix;
-
}
-
public void setSuffix(String suffix) {
-
this.suffix = suffix;
-
}
-
}
The prefix and suffix helps configuring this location logic and the resource loading is done using Spring’s resource abstraction.
That’s it, we have all the pieces of the My MVC web framework! Let’s see how to configure them.
Configuring the My MVC infrastructure with Spring
The configuration is straightforward as it consists in declaring the HandlerMapping, HandlerAdapter and ViewResolver in the DispatcherServlet application context :
-
<?xml version=« 1.0 » encoding=« UTF-8 »?>
-
<beans xmlns=« http://www.springframework.org/schema/beans »
-
xmlns:xsi=« http://www.w3.org/2001/XMLSchema-instance »
-
xsi:schemaLocation=« http://www.springframework.org/schema/beans
-
<bean class=« com.zenika.mymvc.MyMvcHandlerMapping » />
-
<bean class=« com.zenika.mymvc.MyMvcHandlerAdapter » />
-
<bean class=« com.zenika.mymvc.GroovyMyMvcViewResolver »>
-
<property name=« prefix » value=« /WEB-INF/views/ » />
-
<property name=« suffix » value=« .gy » />
-
</bean>
-
</beans>
The DispatcherServlet is configured the usual way, in the web.xml file :
-
<?xml version=« 1.0 » encoding=« UTF-8 »?>
-
<web-app xmlns:xsi=« http://www.w3.org/2001/XMLSchema-instance »
-
xmlns=« http://java.sun.com/xml/ns/javaee » xmlns:web=« http://java.sun.com/xml/ns/javaee/web-app_2_5.xsd »
-
xsi:schemaLocation=« http://java.sun.com/xml/ns/javaee http://java.sun.com/xml/ns/javaee/web-app_2_5.xsd »
-
id=« mymvc » version=« 2.5 »>
-
<display-name>My MVC</display-name>
-
<servlet>
-
<servlet-name>app</servlet-name>
-
<servlet-class>org.springframework.web.servlet.DispatcherServlet</servlet-class>
-
<load-on-startup>1</load-on-startup>
-
</servlet>
-
<servlet-mapping>
-
<servlet-name>app</servlet-name>
-
<url-pattern>/app/*</url-pattern>
-
</servlet-mapping>
-
</web-app>
We are now ready to implement our very first screen with My MVC.
Implementing a MyMVC controller and view
Let’s stick to something simple and echo the HTTP parameters on our My MVC screen. This is the implementation of the controller, which just forward all the incoming HTTP parameters into the model Map:
-
package com.zenika.web;
-
import java.util.Map;
-
import com.zenika.mymvc.MyMvcController;
-
public class MyFirstMyMvcController implements MyMvcController {
-
@Override
-
public String handle(Map<String, String> parameters, Map<String, Object> model) {
-
model.putAll(parameters);
-
return « myfirst »;
-
}
-
@Override
-
public String getPath() {
-
return « /myfirst »;
-
}
-
}
We must declare the MyFirstMyMvcController in the DispatcherServlet application context :
-
<beans (…)>
-
(…)
-
<bean class=« com.zenika.web.MyFirstMyMvcController » />
-
</beans>
Regarding the GroovyMyMvcViewResolver configuration, our Groovy view should be in the src/main/webapp/WEB-INF/views directory and be called myfirst.gy. If we are sure that we’ll have a id parameter in the HTTP request, the view can look like the following :
-
« ${id} »
So, if you start the web container and go to the http://localhost:8080/mymvc/app/myfirst?id=acogoluegnes URL, you see acogoluegnes in your web browser. Ok, it works, but this is not enough. Let’s use some HTML for the layout and list the HTTP parameters :
-
import groovy.xml.MarkupBuilder
-
def writer = new StringWriter()
-
def xml = new MarkupBuilder(writer)
-
xml.html {
-
head { title(‘My MVC’) }
-
body {
-
h1(‘HTTP parameters’)
-
ul {
-
model.each() {key, value ->
-
li ( key+ » = « +value )
-
}
-
}
-
}
-
}
-
writer
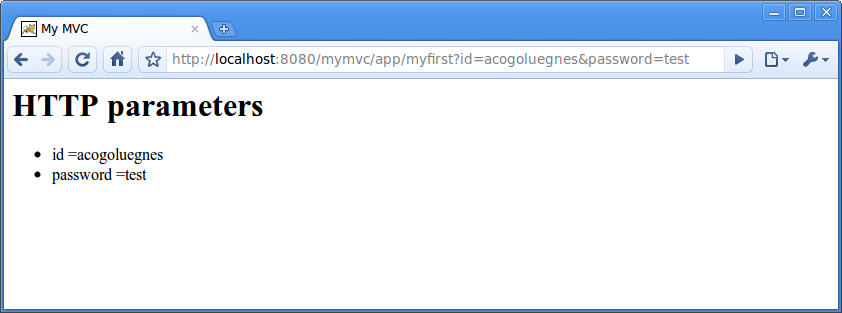
If you go then to the http://localhost:8080/mymvc/app/myfirst?id=acogoluegnes&password=test URL, you should something like the following :
Congrats! You’ve just created a web framework on top of Spring MVC !
Summary
We’ve created a very simple web framework on top of Spring MVC. The My MVC framework is obviously not meant to be fully functionnal, it’s just a illustration of how to use Spring MVC as a technical foundation. Spring MVC comes also with a full-blown web framework, implemented using the same extension points we used for My MVC. This web framework is sometimes called Spring @MVC, because it heavily relies on annotations for its configuration, making it easy to write POJO controllers. As of Spring 3.0, @MVC also has a support for REST: you can easily write RESTful web controllers and also embrace the REST philosophy on the view part, to achieve content negociation for example (using the same controller for several representations of the data, depending on what the client accepts). All these mechanisms can be subtile to grab and knowing more about Spring MVC internals thanks to the little My MVC framework will hopefully help you to configure existing Spring MVC components or implement your own.